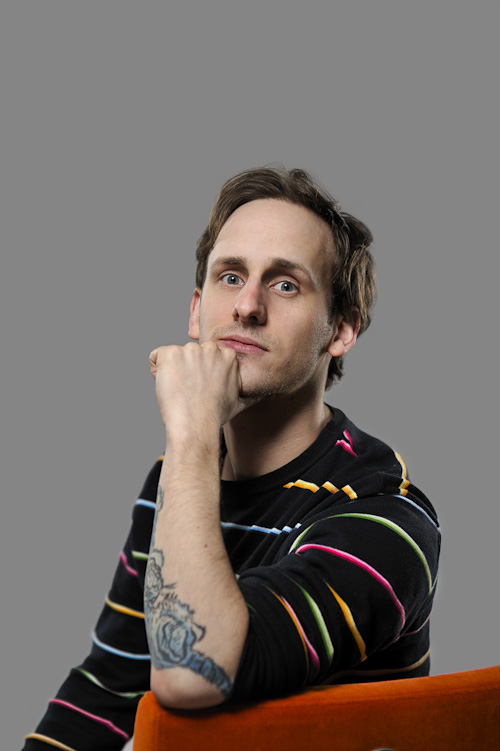
Recently I had the honor of photographing a very talented Swedish comic book artist named Kim W Andersson. Maybe not a worldwide celebrity, but well known in comic book circles. My assignment was to produce some studio portraits for the book publisher he is working for on an upcoming book. And this is how I did it.
Studio lighting diagram, beautydish portrait

I started by researching Kim a bit using Google Image Search, it is always nice to have seen the model’s face before deciding on how to set up the lights. And what I saw made me want to use my griddded white Profoto Softlight Reflector (a beautydish) as my main light, to create a light that would light his facial features in an interesting way (distinct shadows but not too hard light overall).
A beautydish overhead
A Profoto AcuteB 600R were on a boom stand together with the beautydish, above his face, with a grid to reduce the spill on the background. The reason I used the AcuteB for this was to get the lowest possible effect, my other lights, the Profoto Compacts, can’t go that low. And I wanted a portrait with a very shallow DOF (not so clearly visible on he image below, but a lot better in the headshot).
A little fill from far away
If I had lit his face with just a gridded beautydish, chances are that the shadows under his nose and chin would have been very dark. So, I placed another light behind me, a little to the left, to act as fill. Just to reduce the contrast a little.

Rim lights and hair lights
As usual, to create a little separation from the medium grey background, I used the other two lights to light his sides from behind. One behind a diffusion panel and one in a strip softbox. Just a little to put a sparkle in his hair and a line of light on his neck.
The background I used was a medium grey paper background that, for once, came out medium grey. A little light from the fill light together with spill from the diffusor lit it pretty evenly.
Shallow DOF is hard
I like the portraits, the publisher liked them and he liked them, so I guess it was a successful photo session, even if the very short depth of field always creates a lot of problems. Mainly that if focus is just a couple of millimeters off, the whole photo is ruined, in my opinion.
Checking focus on the cameras display is not always easy, even when you zoom in close enough. So a lot of photos had to be deleted (you want sharp eyes not a sharp nose) until I had a batch that I could show the client before fixing them up a bit in Photoshop. Mostly correcting colors and add a little contrast here and there, nothing much really.
Please visit his portfolio/blog for some really good comic book artistery.
Comments on this entry are closed.
Stefan fin bild!
En frÃ¥ga. Funderade lite pÃ¥ ditt arbetsflöde…du skriver sÃ¥ här
“developed in Nikon Capture NX2 and Lightroom, and some adjustments in Photoshop.”
Framkallar du bilderna i NX2 och inte i Lightroom? Vad använder du Lightroom till?
Tack,
det brukar variera. Ibland känns Lightroom bättre och ibland orkar jag med att gå igenom varje bild i Capture NX när det känns som det får ut ett bättre resultat från NEF-filer. Sen kan det hända att en bild som är klar i Capture NX ändå kan förbättras lite i Lightroom när jag ser alla färdiga bilder sida vid sida. Sen är det väl lite lathet som gör att jag skriver det så, för jag använder det som passar bäst och minns inte alltid vilket det var.
Thanks to share your dayly work with us. Nice shots.
Hi Stefan,
Quick question: was it your choice or a request of your client to get such a short DOF on the first shot?
Thanks for sharing your knowledge through illustrations, really helpful.
It was my idea, I think many portraits benefit from having a short DOF when you get in that close. You want the viewer to focus on the eyes, at least that’s how I think.